
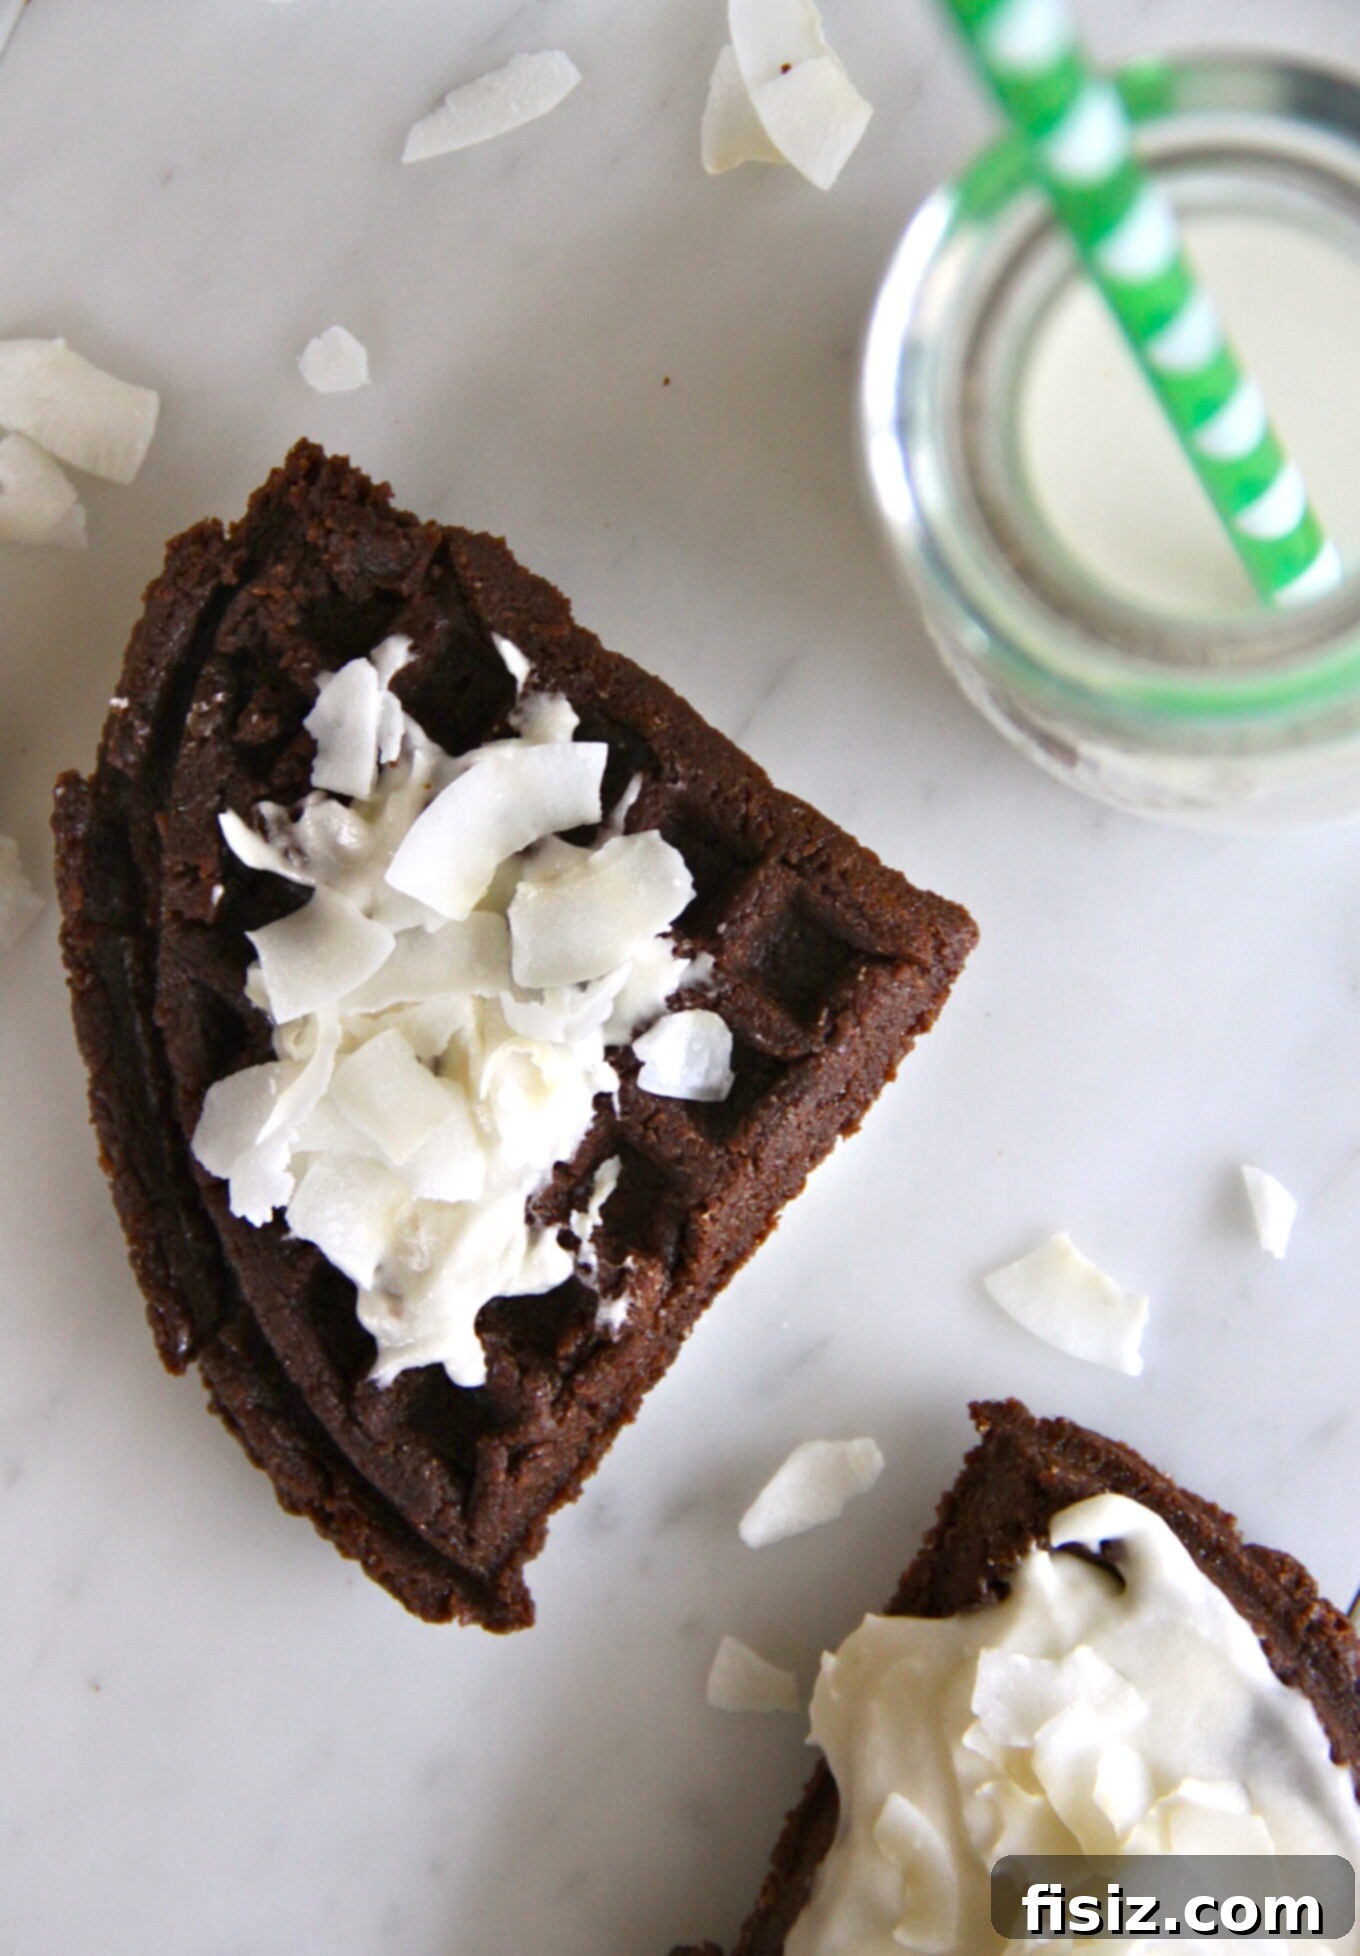
Indulge in Bliss: The Ultimate Mini Brownie Waffles with Vanilla Frosting and Toasted Coconut Flakes
Imagine the rich, fudgy goodness of your favorite chocolate brownie, but with that delightful crispy exterior and tender interior that only a perfectly cooked waffle can provide. Sounds like a dream, doesn’t it? Well, prepare to turn that dream into a delicious reality! Today, we’re diving into the delightful world of Mini Brownie Waffles – a dessert innovation that brings together two beloved treats into one irresistible bite. To elevate this already fantastic creation, we’ll be crowning each mini waffle brownie with a luscious swirl of homemade vanilla frosting and a generous sprinkle of perfectly toasted coconut flakes, adding layers of flavor and texture that will captivate your taste buds.
Whether you’re hosting a brunch, planning a party, or simply craving a unique and indulgent dessert, these brownie waffles are guaranteed to be a showstopper. They offer the perfect balance of chocolatey depth, creamy sweetness, and a hint of tropical crunch, making them an ideal treat for any occasion. Forget choosing between a brownie and a waffle; with this recipe, you get the best of both worlds, miniaturized for maximum charm and portion control. Get ready to impress yourself and everyone lucky enough to try these heavenly bites!
Why Mini Brownie Waffles Are Your Next Obsession
The concept of a brownie waffle might sound unconventional at first, but once you experience it, there’s no going back. The magic happens when the dense, chocolatey brownie batter meets the heated plates of a waffle maker. Instead of the uniform softness of a baked brownie, you get a beautiful textural contrast: a delightfully crisp exterior with those iconic waffle grids, giving way to a warm, gooey, fudgy interior. It’s a symphony of textures and flavors that traditional brownies simply can’t achieve on their own.
Beyond the texture, there’s the sheer versatility. Mini brownie waffles are incredibly adaptable. They can be served warm with a scoop of ice cream for a decadent dessert, enjoyed as a unique breakfast treat, or presented as elegant bite-sized delights at a gathering. The mini format not only makes them incredibly cute and easy to handle but also encourages guilt-free indulgence. You can pop one, two, or even three without feeling overwhelmed, savoring each chocolatey, frosted, coconut-kissed moment. They are perfect for dessert tables, school lunches, or just a fun afternoon snack, offering a portable and less messy alternative to traditional brownies.
The Perfect Trio: Brownie, Vanilla Frosting, and Toasted Coconut
While a plain brownie waffle is delicious on its own, what truly elevates this recipe to extraordinary status are the carefully chosen toppings: creamy vanilla frosting and aromatic toasted coconut flakes. This combination isn’t accidental; it’s a deliberate dance of complementary flavors and textures that transform a simple treat into a gourmet experience.
Vanilla Frosting: A classic for a reason, homemade vanilla frosting provides a smooth, sweet, and comforting counterpoint to the rich intensity of the chocolate brownie. Its creamy texture melts slightly on a warm waffle, creating an irresistible glaze that clings to every ridge. The light, airy sweetness of the vanilla cuts through the deep cocoa notes, ensuring each bite is perfectly balanced and utterly delightful. We’ll aim for a frosting that’s not overly sweet, allowing the other components to shine through, rather than being overpowered.
Toasted Coconut Flakes: Ah, the unsung hero! Toasted coconut flakes add a wonderful layer of complexity, transforming ordinary coconut into something extraordinary. The toasting process brings out their nutty, slightly caramel-like flavor, and their crisp texture provides a much-needed crunch against the soft brownie and smooth frosting. This textural contrast is crucial for a truly satisfying dessert. Visually, they add an elegant touch, making these mini brownie waffles look as good as they taste. Plus, the subtle tropical hint of coconut pairs exceptionally well with chocolate and vanilla, creating a truly gourmet and memorable flavor profile that will have everyone asking for the recipe.
Gather Your Ingredients: What You’ll Need for Brownie Waffle Perfection
Before we embark on this delightful baking adventure, let’s ensure we have all the necessary components. The beauty of this recipe lies in its simplicity, often utilizing ingredients you might already have in your pantry. For the brownie waffles themselves, you’ll need the foundational elements of a good brownie batter, along with a few special touches for the frosting and garnish. Using quality ingredients will always yield the best results, so opt for good quality cocoa powder and pure vanilla extract.
- For the Mini Brownie Waffles:
- 1 cup (120g) all-purpose flour
- ¾ cup (75g) unsweetened cocoa powder (Dutch-processed for a darker, milder flavor)
- 1 ½ cups (300g) granulated sugar
- ½ cup (100g) packed light brown sugar (for extra moisture and chewiness)
- 2 large eggs, at room temperature
- ½ cup (113g) unsalted butter, melted and slightly cooled
- 1 teaspoon pure vanilla extract
- 1 teaspoon baking powder
- ½ teaspoon salt
- ½ cup (120ml) milk (whole milk or buttermilk for tenderness)
- Optional: ½ cup chocolate chips or chunks for extra melty goodness
- For the Vanilla Frosting:
- ½ cup (113g) unsalted butter, softened to room temperature
- 2-3 cups (240-360g) powdered sugar (confectioners’ sugar), sifted
- 1-2 tablespoons milk or heavy cream (for desired consistency)
- 1 teaspoon pure vanilla extract (ensure it’s pure for the best flavor)
- Pinch of salt (to balance the sweetness)
- For Garnish:
- ½ cup sweetened or unsweetened shredded coconut flakes
- Equipment You’ll Need:
- Waffle maker (mini or standard size)
- Large mixing bowls, whisk, rubber spatula
- Measuring cups and spoons
- Wire cooling rack
- Baking sheet (for toasting coconut)
- Piping bag and your favorite piping tip (for frosting, optional but recommended for a professional look)
Having everything measured and ready before you start will make the baking process smooth and enjoyable, preventing any last-minute scrambling and leading to the best possible results. This organized approach, often called ‘mise en place,’ is a baker’s best friend.
Crafting Your Masterpiece: Step-by-Step Guide to Mini Brownie Waffles
Follow these detailed steps to create your own batch of irresistible mini brownie waffles. The process is straightforward, ensuring even novice bakers can achieve spectacular results with minimal effort, transforming basic ingredients into something truly extraordinary.
- Prepare Your Brownie Batter:
In a large bowl, whisk together your dry ingredients: flour, cocoa powder, baking powder, and salt. Ensure there are no lumps in the cocoa powder. In a separate medium bowl, combine the melted butter, granulated sugar, brown sugar, eggs, and vanilla extract. Whisk well until the mixture is smooth, glossy, and slightly lighter in color. Gradually add the dry ingredients to the wet ingredients, mixing until just combined. Be careful not to overmix, as this can develop the gluten too much, leading to tough brownies. Stir in the milk until the batter reaches a consistency slightly thicker than pancake batter – it should be easily pourable but still substantial and rich. If using, gently fold in chocolate chips at this stage for an extra burst of chocolatey goodness.
- Waffle the Brownies:
Preheat your waffle maker according to the manufacturer’s instructions. A medium-high setting usually works best. Lightly grease the waffle plates with cooking spray or a brush of melted butter, even if it’s non-stick, to ensure easy release and crisp edges. Spoon approximately 1-2 tablespoons of brownie batter (depending on the size of your waffle maker; use less for mini, more for standard) into each waffle cavity. Close the lid and cook for 2-4 minutes, or until the brownie waffles are set, slightly crispy on the outside, and cooked through but still delightfully fudgy in the center. Cooking times may vary, so keep a close eye on them; they should be firm enough to remove without breaking. Carefully remove the cooked mini brownie waffles using tongs or a fork and place them on a wire rack to cool slightly. Repeat with the remaining batter, re-greasing the waffle maker if needed between batches.
- Make the Vanilla Frosting:
While the brownie waffles are cooling, prepare your luscious vanilla frosting. In a medium bowl, using an electric mixer, cream together the softened unsalted butter until it is light and fluffy, about 2-3 minutes. Gradually add the powdered sugar, one cup at a time, mixing on low speed until combined, then increasing to medium speed until smooth. Stir in the vanilla extract and a pinch of salt. Add milk or heavy cream, one tablespoon at a time, until you reach your desired piping or spreading consistency – it should be smooth, creamy, and spreadable but not too thin. Beat on medium-high speed for another 2-3 minutes until the frosting is light, airy, and beautifully fluffy.
- Toast the Coconut Flakes:
Preheat your oven to 300°F (150°C). Spread the coconut flakes in a single layer on a baking sheet. Toast for 5-10 minutes, stirring occasionally to ensure even browning, until they turn a beautiful golden brown and become wonderfully fragrant. Keep a close watch, as coconut can burn very quickly once it starts to color. Alternatively, you can toast them in a dry non-stick pan on the stovetop over medium-low heat, stirring constantly, until golden. Allow the toasted coconut to cool completely before using.
- Assemble Your Mini Brownie Waffles:
Once the mini brownie waffles have cooled slightly (they can still be warm, but not hot enough to melt the frosting completely into a puddle), it’s time for the final, delightful touch. Using a knife, a small offset spatula, or for a more elegant presentation, a piping bag fitted with your favorite tip (a star tip works beautifully), generously frost each mini brownie waffle with the vanilla frosting. Immediately sprinkle the cooled, toasted coconut flakes over the frosting, pressing them gently if needed to adhere. Serve immediately for the freshest experience, or arrange them on a platter for your guests to admire before indulging. These are best enjoyed fresh, but can be stored.
Tips for Success and Creative Variations
Achieving brownie waffle perfection is easier than you think, especially with a few handy tips. And for those who love to experiment, there are endless ways to customize this delightful dessert to suit your taste or occasion, making it truly your own signature treat.
- Don’t Overfill Your Waffle Maker: Too much batter will spill out the sides, making a mess and potentially an unevenly cooked waffle. Start with a smaller amount (around 1-2 tablespoons for mini waffles) and adjust as needed after the first batch.
- Grease Consistently: Even non-stick waffle makers benefit from a light greasing with cooking spray or a brush of melted butter between batches. This ensures easy release, helps achieve those perfectly crispy edges, and prevents sticking.
- Cooling is Key: While delicious warm, allow the waffles to cool slightly (to just warm or room temperature) before frosting to prevent the frosting from melting completely and sliding off.
- Storage: Store unfrosted brownie waffles in an airtight container at room temperature for up to 2-3 days, or freeze them for up to 1 month. Thaw at room temperature and gently rewarm in a toaster or oven for a few minutes if desired. Frost them just before serving for the freshest and most appealing results.
- Flavor Variations for Brownies:
- Espresso Kick: Add 1-2 teaspoons of instant espresso powder or coffee granules to the brownie batter to significantly deepen and intensify the chocolate flavor without making it taste like coffee.
- Minty Fresh: Incorporate a few drops of pure peppermint extract into the brownie batter or vanilla frosting for a refreshing twist, creating a delightful mint-chocolate combination.
- Nutty Delight: Fold in ½ cup of finely chopped walnuts, pecans, or almonds into the brownie batter for an added layer of texture and nutty flavor.
- Spice It Up: A pinch of cayenne pepper in the brownie batter can add a subtle, intriguing warmth that complements chocolate beautifully.
- Frosting Alternatives:
- Rich Chocolate Ganache: A simple pourable chocolate ganache (heavy cream heated and poured over chocolate chips, then stirred) instead of vanilla frosting offers an extra layer of chocolate indulgence.
- Tangy Cream Cheese Frosting: A classic cream cheese frosting, with its slight tang, would beautifully complement the rich brownie.
- Quick Nutella Drizzle: For a super-fast topping, warm some Nutella slightly and drizzle it over the brownie waffles.
- Peanut Butter Frosting: Creamy peanut butter frosting would be a fantastic pairing for any chocolate lover.
- Other Topping Ideas:
- Chopped nuts (pecans, walnuts, almonds, pistachios) for extra crunch.
- Mini chocolate chips, colorful sprinkles, or chocolate shavings.
- Fresh berries (raspberries, strawberries, blueberries) add a touch of freshness and color.
- A swirl of caramel sauce or extra chocolate drizzle.
- A light dusting of powdered sugar for a simpler, elegant finish.
- A scoop of your favorite ice cream or a dollop of whipped cream.
Don’t be afraid to get creative and make these mini brownie waffles truly your own! The possibilities are endless when it comes to customizing these versatile treats.
Your Next Dessert Sensation Awaits!
These Mini Brownie Waffles with Vanilla Frosting and Toasted Coconut Flakes are more than just a dessert; they’re an experience. They combine the best elements of comfort food with an elegant, fun presentation, making them perfect for any gathering, a delightful weekend project, or simply a special treat for yourself. They’re sure to bring smiles and satisfy even the most demanding sweet tooth.
So, fire up your waffle maker, gather your ingredients, and prepare to delight your senses and those of your loved ones with these incredible bite-sized wonders. We guarantee they’ll earn a permanent spot in your recipe repertoire as a go-to dessert that’s both impressive and surprisingly easy to make. Happy baking, and enjoy every delicious bite!