
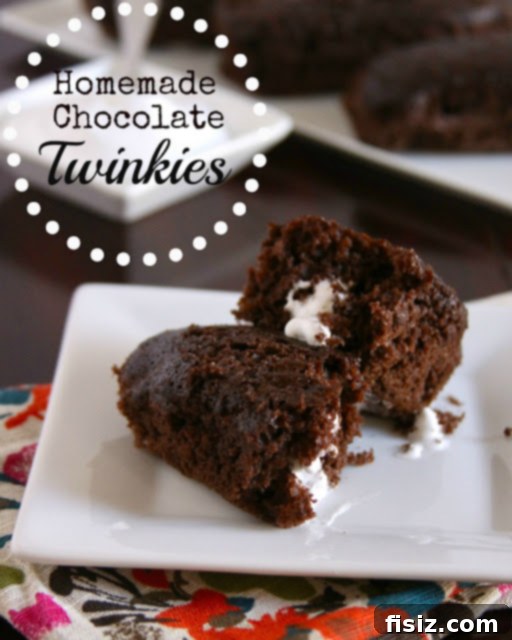
Crafting Your Own Nostalgia: Homemade Chocolate Twinkies with Cloud-Like Meringue Filling
There’s something undeniably magical about recreating beloved treats from our childhood kitchens. The Twinkie, an iconic American snack cake, holds a special place in the hearts of many. While the classic golden sponge cake with its creamy vanilla filling is a staple, imagine elevating this nostalgic delight to new heights: rich chocolate cake combined with a fluffy, sweet meringue filling. This guide will walk you through crafting your very own homemade chocolate Twinkies with meringue filling, promising a truly unforgettable dessert experience that surpasses anything you’d find in a box.

Unwrapping the Sweet History of the Twinkie: More Than Just a Snack
Before we dive into the delicious details of our recipe, let’s take a moment to appreciate the fascinating origins of the Twinkie. This quintessential American snack cake, beloved by generations, boasts a surprisingly rich history that began nearly a century ago.
The Birth of an Icon: James Alexander Dewar’s Innovation
The Twinkie was ingeniously invented in 1930 by James Alexander Dewar, a baker at the Continental Baking Company, which would later become the renowned Hostess Brands. Dewar’s stroke of genius came during the Great Depression, a time when finding affordable and appealing treats was paramount. His idea was simple yet brilliant: utilize underused shortcake pans by filling them with a creamy concoction, creating a small, inexpensive, and shelf-stable cake. This innovation not only saved money for the company but also introduced a revolutionary product that would stand the test of time.
A Billboard Inspiration: The Naming of the Twinkie
The story behind the Twinkie’s distinctive name is as charming as its taste. Legend has it that Mr. Dewar was on a business trip in St. Louis when he spotted a billboard advertising “Twinkle Toe Shoes.” The whimsical name resonated with him, sparking the inspiration for “Twinkie.” This serendipitous moment gave birth to a brand name that would become synonymous with American snack culture, embodying a sense of lightheartedness and joy that perfectly matched the treat itself.
From Banana to Vanilla: Wartime Adjustments and Lasting Changes
Originally, the Twinkie featured a delightful banana cream filling, offering a distinct flavor that many older enthusiasts fondly remember. However, the advent of World War II brought about significant changes. As bananas became subject to rationing, a crucial ingredient for the original filling became scarce. To maintain production, Hostess adapted, switching to a more readily available vanilla-based cream filling. This wartime necessity inadvertently created the iconic vanilla cream flavor that most consumers associate with Twinkies today, proving that sometimes, necessity truly is the mother of invention and even culinary evolution.
These historical tidbits highlight the journey of a simple snack cake from an innovative idea to a cultural phenomenon. Knowing the legacy behind each bite makes the experience of recreating these treats at home even more special.
The Joy of Baking Homemade: Beyond the Box
Why bother making Twinkies from scratch when you can grab a box from the store? The answer lies in the unparalleled satisfaction of homemade treats. Baking your own Twinkies allows for complete control over ingredients, ensuring freshness and the absence of unwanted preservatives. More importantly, it offers the freedom to innovate. While the original Twinkie is a classic, our recipe ventures into exciting new territory, transforming the familiar snack into a gourmet delight with rich chocolate cake and a light, airy meringue filling. This isn’t just baking; it’s an act of culinary creativity and a journey into delicious customization.
Today’s culinary adventure is all about embracing that creativity. We’re not just making Twinkies; we’re crafting homemade chocolate Twinkies with a delicate meringue filling! Prepare yourself for a sweet revelation that combines the nostalgic shape with an unexpectedly sophisticated flavor profile. Get ready to impress your taste buds and everyone lucky enough to share in these delightful creations!
Get Ready to Bake: Our Unique Chocolate Twinkie Creation
Forget the quadratic formula and complex equations; today’s recipe requires only your enthusiasm, keen eyesight, and a dash of wonder. We’re about to embark on a baking journey that will transform a simple box of cake mix and a few common ingredients into a dozen or more utterly charming, homemade chocolate Twinkies filled with a cloud-like meringue. This sweet project promises to be as fun to make as it is to devour. So, hold on to your aprons and let’s get started on these delightful treats!

Homemade Chocolate Twinkies with Meringue Filling Recipe
Yields: 12 to 18 Twinkies
Prep Time: Approximately 15 minutes
Cook Time: Approximately 20 minutes
Ingredients:
For the Chocolate Twinkies:
- 1 box (about 15.25 ounces) your favorite chocolate cake mix (look for one that makes a moist cake)
- 3 large eggs, at room temperature
- 1/2 cup vegetable oil
- 1 and 1/2 cups water (or milk for a richer cake)
For the Meringue Filling:
- 3 large egg whites, at room temperature (critical for optimal volume)
- 1/4 teaspoon cream of tartar (helps stabilize the egg whites)
- 3/4 cup granulated sugar
Equipment You’ll Need:
- Aluminum foil
- Non-stick cooking spray
- Spice bottle or similar cylindrical object (for shaping molds)
- Large mixing bowls
- Electric mixer (handheld or stand mixer)
- Whisk
- Baking sheet
- Toothpicks
- Small utensil (e.g., skewer, chopstick) for poking holes
- Piping bag or a large Ziploc bag with a corner snipped
Directions:
For the Chocolate Twinkies:
-
Prepare Your DIY Twinkie Molds: This innovative step allows you to create the classic Twinkie shape without specialized pans.
- First, tear off pieces of aluminum foil, approximately 8 x 12 inches in length. For best results and sturdy molds, you might consider using heavy-duty foil or doubling up standard foil.
- Fold each piece of foil lengthwise. Crease the sides firmly to ensure the foil creates a sealed “boat” shape with no gaps.
- Next, place a spice bottle (or a similarly sized cylindrical object, about 1-1.5 inches in diameter) in the center of the folded foil. Carefully fold and press the foil around the bottom half of the bottle, leaving the top half exposed. This will create the rounded bottom of your Twinkie shape.
- Gently remove the spice bottle. You should now have a sturdy, boat-shaped foil mold. If you desire extra rigidity, you can wrap another layer of foil around your initial mold. Repeat this process to make 12 to 18 molds.
- Once all your Twinkie boats are formed, generously spray the insides of each with non-stick cooking spray. This crucial step prevents sticking and ensures your cakes release beautifully after baking.
-
Mix the Chocolate Cake Batter:
- In a large mixing bowl, combine the chocolate cake mix, room temperature eggs, vegetable oil, and water (or milk).
- Beat the ingredients together using an electric mixer on medium speed for about 2-3 minutes, or until the batter is smooth and well combined. Scrape down the sides of the bowl as needed to ensure everything is incorporated. Be careful not to overmix, as this can lead to a tougher cake texture.
-
Fill and Bake the Twinkie Cakes:
- Carefully spoon the chocolate cake batter into your prepared foil molds, filling each one approximately halfway. Avoid overfilling, as the cakes will rise during baking. The goal is a light, airy sponge, not a dense muffin.
- Arrange the filled foil boats on a baking sheet, ensuring they are not touching each other too closely to allow for even heat circulation.
- Bake in a preheated oven at 350°F (175°C) for approximately 17 to 20 minutes. Baking times can vary depending on your oven, so keep an eye on them.
- The cakes are done when a toothpick inserted into the center comes out clean. The tops should be set and spring back lightly when touched.
- Crucially, LET THEM COOL COMPLETELY on a wire rack before attempting to fill them with meringue. Warm cakes will cause the meringue to melt and seep out, ruining the filling. This patience will be rewarded!

For the Meringue Filling:
-
Prepare the Meringue: The secret to a perfect meringue is starting with room temperature egg whites.
- In a clean, dry mixing bowl (preferably metal or glass, as plastic can retain grease), beat the room temperature egg whites with the cream of tartar on medium speed until they become foamy and opaque. The cream of tartar helps to stabilize the egg whites, ensuring a strong, stable meringue.
- Gradually add the granulated sugar, a tablespoon at a time, while continuing to beat on medium-high speed. Do not rush this step; slowly incorporating the sugar allows it to dissolve properly, resulting in a smooth, glossy meringue.
- Continue beating until soft, glossy peaks form. When you lift the beaters, the meringue should hold its shape but the very tip of the peak will gently curl over. Be careful not to overbeat, or the meringue can become dry and crumbly.
-
Fill the Cooled Chocolate Twinkies: This is arguably the most satisfying part of the process!
- Once your chocolate Twinkies have cooled completely, carefully remove them from their foil molds.
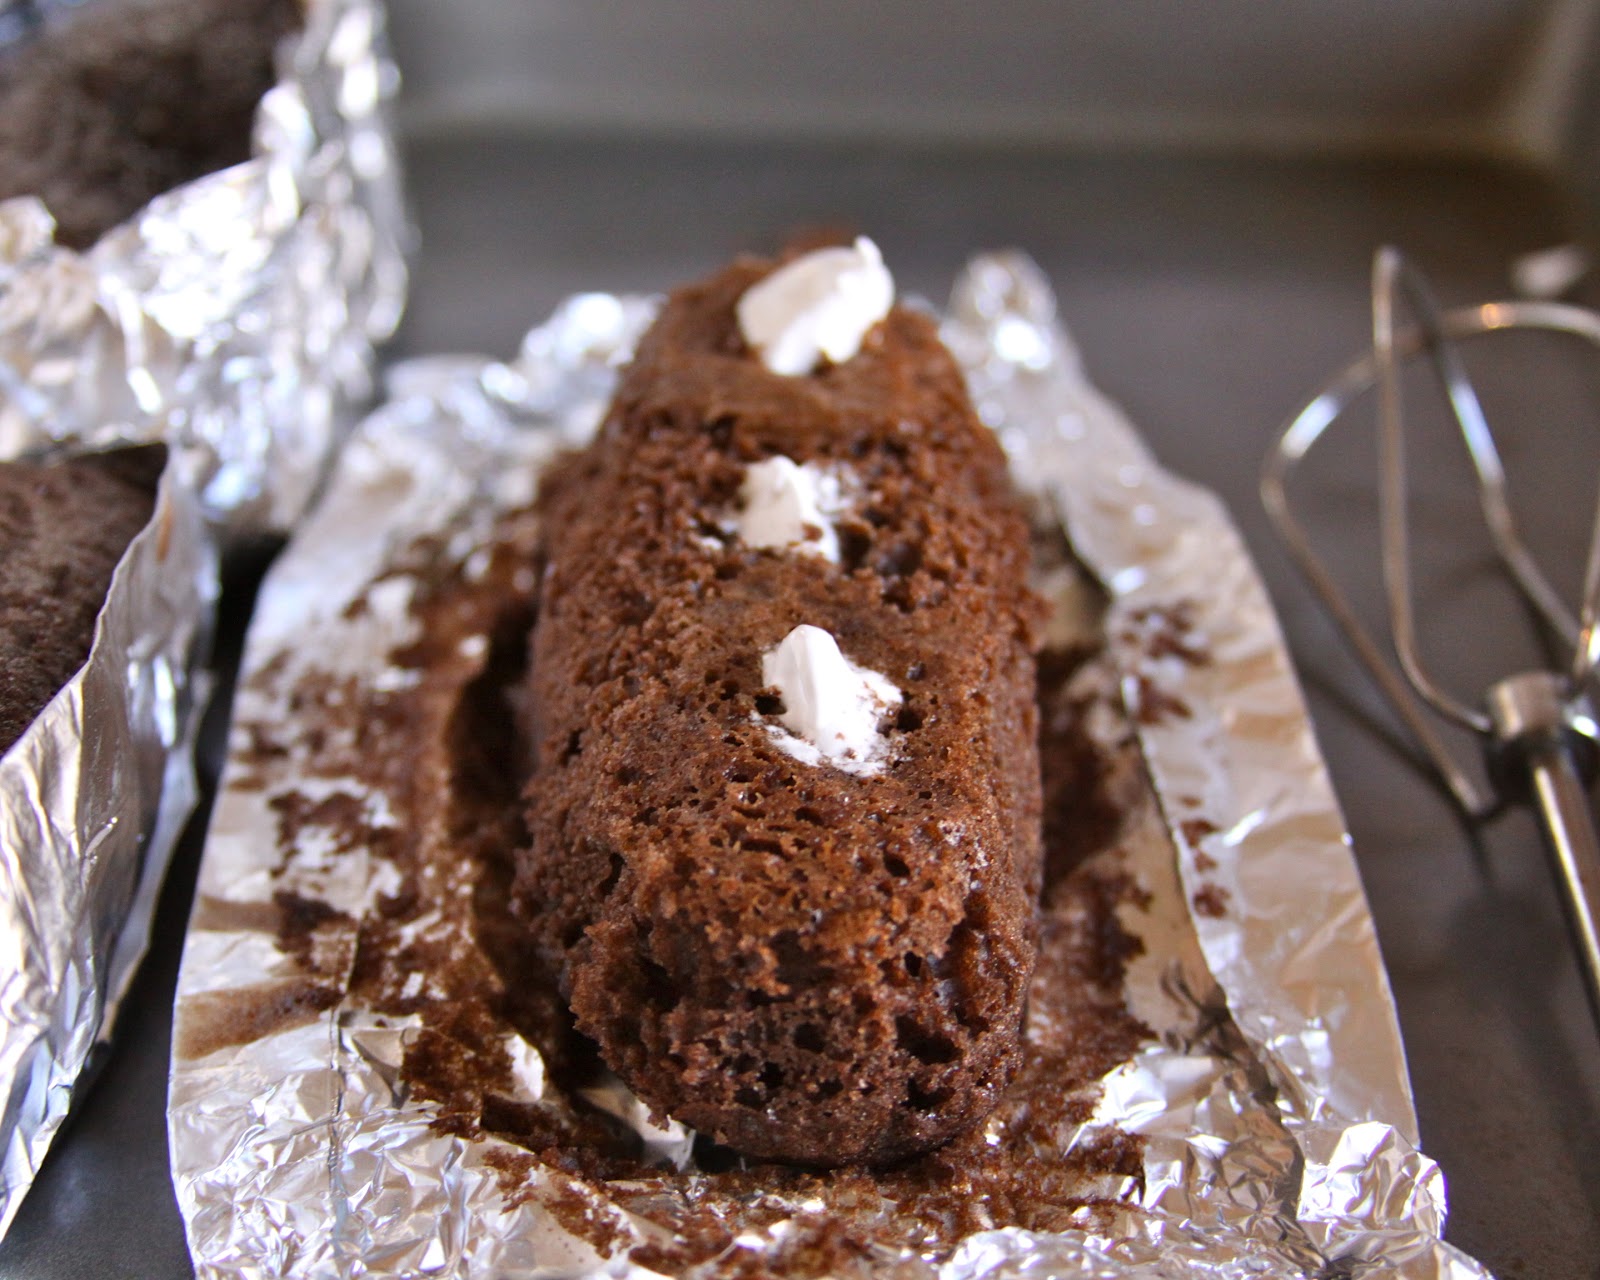
- Using a small utensil, such as a skewer, chopstick, or the end of a piping tip, gently poke three evenly spaced holes along the bottom of each cake. The goal is to create small channels for the meringue without poking all the way through the top or creating a giant, unsightly hole. Precision here helps maintain the structural integrity and aesthetic appeal of your Twinkies.
- Transfer your whipped meringue filling into a piping bag fitted with a small round tip, or into a large Ziploc bag with one corner snipped off to create a small opening (about 1/4 inch).
- Carefully insert the tip of your piping bag into each of the three holes and gently pipe just enough meringue into the cake until you feel a slight resistance or see the cake slightly expand. Be mindful not to overfill, as this can cause the cake to split.
- Repeat for all holes on each Twinkie. Feel free to lick your fingers as necessary – it’s part of the homemade baking experience!
Pro Tips for Perfect Homemade Twinkies
Achieving bakery-quality homemade Twinkies is easier than you think, especially with a few expert tips. Firstly, always ensure your eggs are at room temperature for both the cake and the meringue. This allows them to incorporate better and achieve maximum volume, crucial for light cakes and fluffy meringue. When mixing your cake batter, resist the urge to overmix; stop as soon as ingredients are combined to keep the cake tender. For the meringue, slowly adding the sugar while beating helps it dissolve fully, resulting in a stable and glossy filling.
Patience is truly a virtue, especially when it comes to cooling your cakes. Allowing them to cool completely before filling is non-negotiable to prevent a melty, messy filling. When piping, a steady hand and a keen eye will ensure evenly filled Twinkies. Don’t be afraid to practice on a scrap piece of parchment paper first if you’re new to piping. Finally, don’t be afraid to experiment! While chocolate and meringue are delightful, consider other cake flavors or alternative fillings like flavored buttercreams, fruit curds, or even a classic vanilla cream for a different twist on your homemade treats.

Indulge in Your Homemade Masterpiece!
After all your diligent work of molding, baking, and filling, your homemade chocolate Twinkies with meringue filling are ready to be enjoyed! The moment of truth arrives when you bite into the tender chocolate cake, met with the sweet, ethereal cloud of meringue. It’s a truly rewarding experience, offering a burst of flavor and a superior texture that a store-bought version simply cannot match.
Serve these delightful creations as a special dessert, an afternoon treat, or even a unique party favor. Be warned, though: these delectable homemade Twinkies have a way of disappearing quickly! A sneaky significant other or an eager family member might just try to snatch them all before you’ve had your fill. Don’t say we didn’t warn you – these are irresistible!
Store any leftover Twinkies in an airtight container at room temperature for up to 2-3 days, or in the refrigerator if your meringue is particularly sensitive to warmth. We encourage you to share your baking triumphs and perhaps even inspire others to embark on their own homemade Twinkie adventure. Happy baking, and even happier eating!