
The culinary world often bows to the undisputed mastery of French chefs and pâtissiers. From legendary figures like Jacques Pépin, whose classical techniques have inspired generations, to contemporary innovators such as Eric Ripert, celebrated for his refined seafood creations, the French have undeniably perfected the art of cooking and baking. Their influence is woven into the fabric of global gastronomy, setting standards for precision, flavor, and elegance. Yet, even within this realm of culinary excellence, certain preparations can strike fear into the hearts of even seasoned home cooks. Today, we’re venturing into one such territory: the delicate, often intimidating, world of custards.
Mastering Crème Anglaise: Conquering the Art of French Custard
For many, the mere mention of “custard” evokes a sense of dread. There’s a particular vulnerability that comes with attempting these velvety creations. Personally, when it comes to the sweet side of cooking, I confess a certain shyness, almost a paralysis, particularly around custards. Why do they inspire such trepidation? Perhaps it’s the demanding nature of absolute perfection required from start to finish. Every single step, from gently warming the milk and cream – ensuring they never boil – to meticulously whisking in the egg yolks without letting them curdle or scramble, demands unwavering precision and attention. The margin for error feels incredibly slim, making each attempt a high-stakes culinary drama.
But true growth in the kitchen often comes from confronting these culinary fears head-on. So, in a courageous effort to face my long-standing apprehension toward French custards, I decided to tackle one of the most fundamental and versatile of them all: Crème Anglaise. By definition, Crème Anglaise is a light, pourable custard sauce, designed to complement a myriad of desserts. At its core, it’s a harmonious blend of milk, egg yolks, and sugar, traditionally infused with the aromatic essence of a vanilla bean. Its simplicity in ingredients belies the delicate technique required to achieve its signature silken texture and rich flavor.
Embarking on this journey, my primary goal was to succeed, not just in theory, but in practice. To maximize my chances of culinary triumph, I sought out a reliable and straightforward recipe. My search led me to an approachable guide on Epicurious, a trusted source for home cooks. As I stood at the precipice of this undertaking, a crucial question echoed in my mind: Am I truly ready? More importantly, are you ready to join me in demystifying this elegant French classic?
Okay. Take a deep breath. Let the culinary adventure begin. Here, we’ll transform simple ingredients into a sophisticated sauce that will elevate any dessert.
The Essential Guide to Crafting Perfect Crème Anglaise
Gathering Your Ingredients: Quality Matters
Success in any recipe, especially one as delicate as Crème Anglaise, hinges on the quality and preparation of your ingredients. While the list is short, each component plays a vital role in achieving that coveted silky texture and rich flavor.
- Whole Milk: 1/2 cup (*Crucially, always opt for whole milk. Skim or low-fat milk simply won’t provide the necessary richness and fat content for a stable, luxurious custard.)
- Heavy Whipping Cream: 1/2 cup (*This adds further richness and contributes significantly to the sauce’s creamy mouthfeel.)
- Vanilla Bean: 1 (2-inch piece, split lengthwise) (*For an unparalleled aromatic experience, a fresh vanilla bean is ideal. Its tiny seeds infuse a complex, authentic vanilla flavor. If a vanilla bean is unavailable or cost-prohibitive, a good quality vanilla extract can be used as a substitute, typically 1 teaspoon.)
- Large Egg Yolks: 3 (*These are the binding agents, providing structure, richness, and that beautiful pale yellow hue. Ensure they are fresh.)
- Granulated Sugar: 3 tablespoons (*Balances the richness of the dairy and eggs, adding essential sweetness without overpowering the vanilla.)
Step-by-Step Directions: Precision is Key
The journey to a perfect Crème Anglaise is one of controlled heat and gentle encouragement. Follow these steps meticulously, and you’ll be rewarded with a sauce that tastes as professional as it looks.
Step 1: Infusing the Dairy Base
Begin by combining the whole milk and heavy cream in a heavy-bottomed medium saucepan. A heavy saucepan is crucial here as it distributes heat more evenly, preventing scorching. Next, take your vanilla bean (if using) and carefully scrape the tiny, fragrant seeds from inside the pod directly into the milk and cream mixture. Don’t discard the scraped bean pod; add it to the saucepan as well, as it still holds a great deal of flavor. If you’re using vanilla extract, you’ll add it later to preserve its delicate notes. Gently bring this mixture to a bare simmer over medium-low heat. You’re looking for small bubbles just forming around the edges of the pan, not a rolling boil. Boiling will scald the milk and negatively impact the flavor. Once it reaches a simmer, remove the saucepan from the heat immediately.
Step 2: Preparing the Egg Yolks and Tempering
In a separate medium-sized bowl, whisk together the egg yolks and granulated sugar until the mixture is pale yellow and slightly thickened. This process is called “ribboning,” where lifting the whisk allows the mixture to fall back in a ribbon-like stream. Now comes the most critical step: tempering the egg yolks. This process gradually raises the temperature of the yolks, preventing them from scrambling when introduced to the hot milk. You must proceed gradually, and I mean *gradually*. Slowly, in a thin stream, whisk about a quarter to a third of the hot milk mixture into the egg yolk mixture. Whisk continuously as you pour. This warms the eggs gently. Then, pour the warmed egg mixture back into the remaining hot milk in the saucepan, continuing to whisk all the while. This ensures the eggs are fully incorporated and evenly tempered.
Step 3: Cooking the Custard to Perfection
Return the saucepan with the custard mixture to the stovetop. Cook over low heat, stirring constantly with a wooden spoon or a heatproof spatula. The key here is gentle, continuous motion to prevent the custard from sticking to the bottom or cooking unevenly. Continue to stir until the custard thickens just enough to coat the back of your spoon. To test this, dip your spoon into the custard, then run your finger across the back of the spoon; a clear path should remain. This typically takes about five to seven minutes. **UNDER NO CIRCUMSTANCES SHOULD THE CUSTARD BOIL.** Boiling will cause the egg proteins to coagulate too quickly, leading to a lumpy, scrambled texture, reminiscent of something you’d rather avoid – truly ugly, like hospital cafeteria cottage cheese ugly. If you’re using vanilla extract, stir it in now, after removing from the heat.
Step 4: Straining and Chilling for Silky Smoothness
Immediately after the custard reaches the desired thickness, remove it from the heat. Strain the sauce through a fine-mesh sieve into a clean bowl. This crucial step ensures that any tiny bits of cooked egg, or pieces of vanilla bean, are removed, leaving you with a wonderfully luscious, impeccably smooth custard. The straining process is your ultimate safeguard against any textural imperfections. Cover the surface of the custard directly with plastic wrap to prevent a skin from forming as it cools. Chill thoroughly in the refrigerator for at least a few hours, or until completely cold. Crème Anglaise can be made one day ahead, making it an ideal make-ahead component for entertaining.
Serving Suggestions: The Versatility of Crème Anglaise
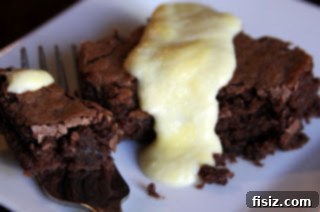
Once chilled, your homemade Crème Anglaise is ready to transform ordinary desserts into extraordinary experiences. Its light, pouring consistency and rich vanilla flavor make it incredibly versatile. Drizzle it generously over a warm chocolate lava cake, allowing the cool custard to melt slightly into the warm chocolate. It’s magnificent with fresh berries, elevating their natural sweetness. Pair it with fruit tarts, bread pudding, apple crisp, or even simple slices of pound cake. Some might even find themselves tempted to simply lick the bowl clean – a perfectly acceptable indulgence, I assure you!
The Triumph of Overcoming Culinary Fears
After all the anticipation, the careful steps, and the nagging anxiety about whether I could actually pull off this delicate custard, I can now confidently declare a resounding success. I have not only made Crème Anglaise, but I have also whipped my long-held custard fear into smooth, silky submission. No longer am I paralyzed by the dread of scrambling eggs or overcooking a delicate sauce. Instead, I am immensely proud to have befriended a new culinary companion. This experience isn’t just about a recipe; it’s about the profound satisfaction of mastering a perceived challenge, expanding my culinary repertoire, and gaining confidence in the kitchen. It’s a reminder that sometimes, the most daunting tasks yield the sweetest rewards.
Now, go forth and enjoy your exquisite creation. Bon Appétit!
Ingredients Summary:
- 1/2 cup whole milk
- 1/2 cup heavy whipping cream
- 1 (2-inch) piece vanilla bean, split (or 1 teaspoon vanilla extract)
- 3 large egg yolks
- 3 tablespoons granulated sugar
Directions Summary:
- Combine milk and cream in a heavy medium saucepan. Scrape in seeds from vanilla bean; add bean pod (or reserve vanilla extract for later). Bring milk mixture to a bare simmer. Remove from heat.
- Whisk egg yolks and sugar in a medium bowl until blended and slightly pale.
- Gradually whisk about a quarter to a third of the hot milk mixture into the yolk mixture to temper the eggs.
- Pour the tempered egg mixture back into the saucepan with the remaining hot milk, whisking constantly.
- Return custard to saucepan. Stir over low heat until the custard thickens and coats the back of a spoon, leaving a clear path when a finger is drawn across it (about 5-7 minutes). Do not boil.
- If using, stir in vanilla extract now.
- Strain the sauce through a fine-mesh sieve into a clean bowl.
- Cover the surface directly with plastic wrap and chill completely in the refrigerator. Can be made one day ahead.
For more delicious adventures and culinary inspiration, check out our other Foodie Fridays! Happy cooking!